

You're probably staring at a blank mortarboard, a half-saved Pinterest board, and a school email that says “decorations permitted” without telling you what that means. That's how caps get ruined, gowns get sticky, and graduates get stopped at the door by staff who don't care how long you spent gluing rhinestones.
Treat cap and gown decorations like a compliance job first. Craft project second. The cap is part of academic dress, not a free-for-all poster, and that matters because the modern tassel-and-mortarboard setup was formalized long ago. Gowns trace back to the 12th century, caps evolved into square mortarboards by the 1700s, and the 1895 Intercollegiate Code of Academic Costume locked in the black cap with a long tassel attached at the top center, which is why the tassel still rules the design space today (History of graduation cap and gown traditions).
If you want a cap that survives approval, looks sharp from the audience, and doesn't wreck the rest of your regalia, build backward from the rules. Start with what your school allows. Then make the design fit the gown, tassel, and stole you're wearing. That's how you get a look that reads cleanly on stage instead of looking like five last-minute purchases fighting each other.
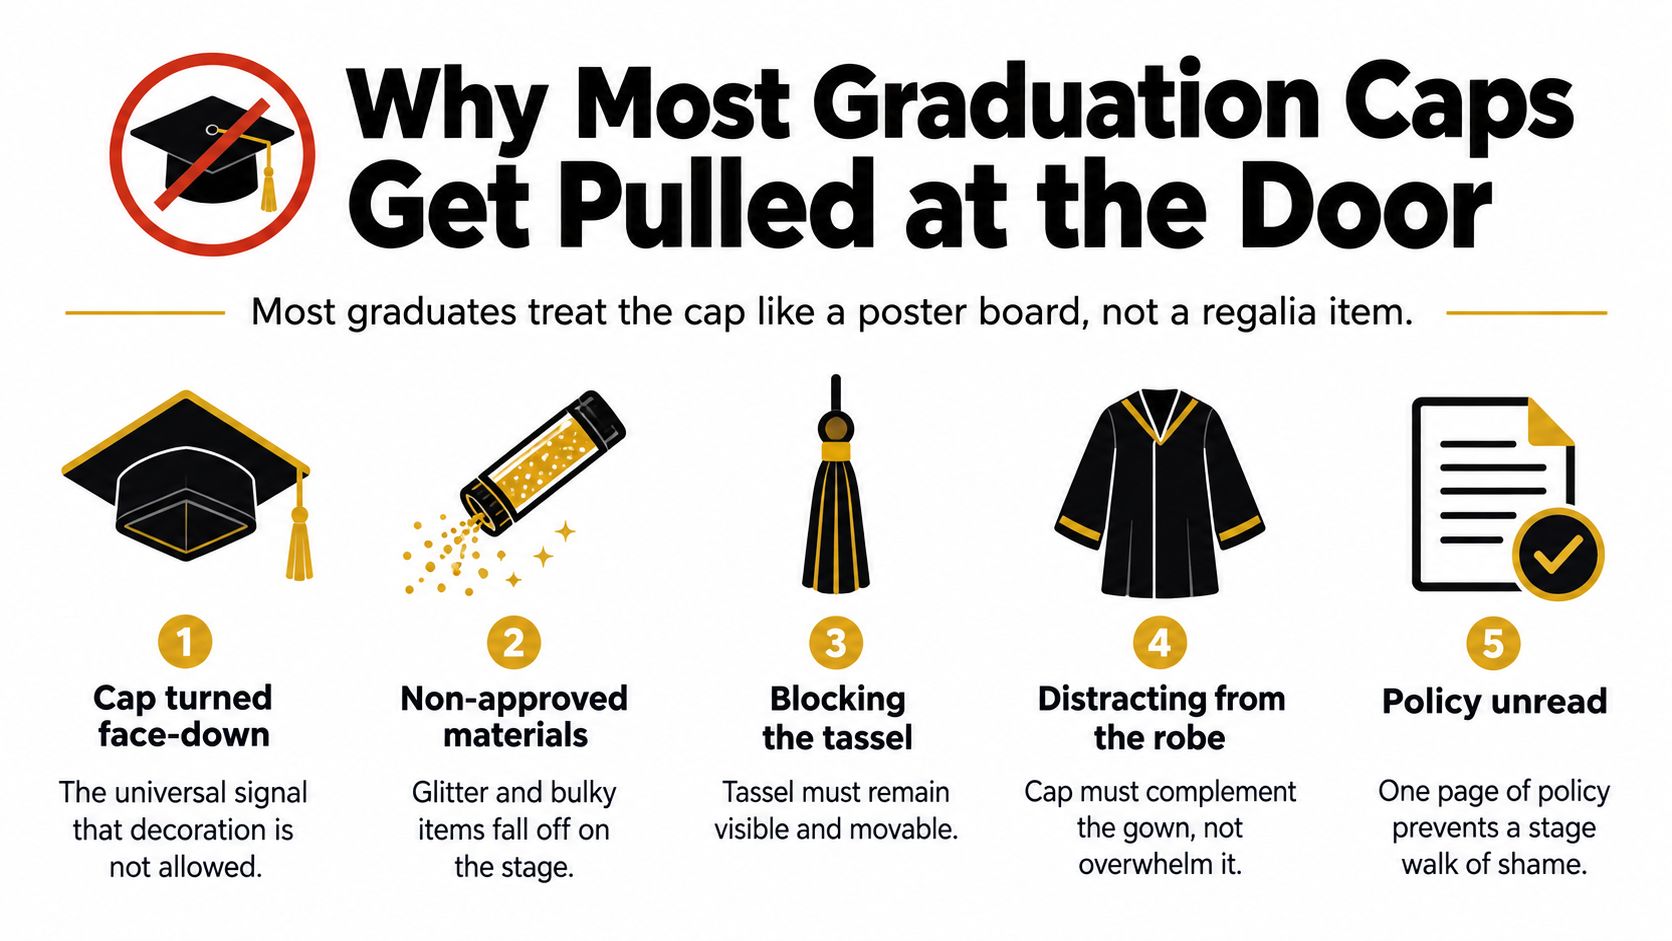
Why Most Graduation Caps Get Pulled at the Door
The ugly moment happens fast. You're lined up, your family is already seated, and a staff member spots the cap. They don't care that it looked cute on your desk. They care that it's too tall, too loose, too distracting, or against policy.
Most grads get in trouble because they treat the mortarboard like scrapbooking space. It isn't. It's regulated regalia, and schools usually police it that way. Many institutions that allow decorating still limit it to the flat top surface only, ban dangling pieces, and reject anything that sticks up too far. Kansas State requires adornments to lay flat, and McNeese allows raised elements only if they stay within a 1 inch limit and pass review, which gives you a practical build spec whether your school writes it that clearly or not (graduation cap decoration guidelines and height limits).
Ask These Three Questions Before You Glue Anything
The first filter is simple. What does your school ban outright? Some schools only care about height and loose objects. Others care about message content, material type, or whether the cap has been structurally altered.
The second filter is the gown. If it's a rental, you're borrowing it, not customizing it. Anything that sheds, snags, melts, stains, or transfers from the cap onto the robe is a bad idea.
The third filter is visibility. A design has to read from a few rows away. If your message only works from six inches away on your bedroom floor, it won't work in a ceremony.
Practical rule: If your design needs explanation, it's too complicated for commencement.
The Five Reasons Staff Pull Caps
- Policy wasn't read: Students guess based on social media, not the actual ceremony page.
- Materials shed or detach: Loose glitter, weak glue, and bulky add-ons leave debris on seats and stage.
- The tassel gets blocked: If the tassel can't move cleanly, your cap is built wrong.
- The cap overpowers the regalia: Your mortarboard should complement the gown, not start a fight with it.
- It won't survive handling: Caps get carried, stacked, checked, and adjusted. Fragile builds fail under ordinary movement.
A lot of graduates obsess over the cap and ignore the rest of the look. That's backward. If you also want something meaningful after the ceremony, skip junky add-ons and consider high-margin graduation keepsakes that don't risk approval at all.
What Usually Survives Approval
The safest caps share a few traits. They're flat. They're light. They keep the tassel visible. And they use bold, readable design choices instead of clutter.
That knocks out a huge category of ideas right away. Good. Eliminate bad options early and the whole process gets easier.
Know Your Cap, Gown, Tassel, and Stole Before You Decorate
Too many grads talk about “decorating my graduation outfit” like it's one surface. It isn't. You've got four separate zones, and each one has different rules, risks, and payoff.
That matters because academic dress evolved to signal rank and field. In the 18th and 19th centuries, hoods became more colorful to identify a college or degree, and many institutions later standardized tassel color by degree type. One university tradition notes that doctorates may wear a gold tassel while other graduates wear black. By the 19th century, the tassel had replaced earlier cap toppers and the mortarboard had become required student attire, which is why these details now function as formal academic coding, not random decoration (academic regalia traditions and tassel meaning).
The Mortarboard
This is the zone everyone wants to touch, and the zone committees watch hardest. Usually, only the top surface is in play. The underside might be fair game at some schools for a private note or a reveal moment, but don't assume that unless your ceremony guidance says so.
Keep the design flush to the board. If you can slide your hand under an embellishment, it's probably too raised.
The Gown
The gown is where bad decisions turn expensive fast. Rental fabric doesn't forgive hot glue, iron-on adhesive, paint transfer, safety pin clusters, or sticky residue.
You shouldn't pierce it, heat it, or glue anything to it. Steam wrinkles out of it. Don't “customize” it.
The Tassel
The tassel isn't decorative filler. It's part of the regalia code, and schools protect it. Some schools also care about the side it starts on before the ceremony and when it's moved after conferral, so check the ceremony instructions and keep that movement unobstructed.
The Stole and Cords
This is the smart zone for identity, affiliation, and color. Stoles and cords carry meaning cleanly without adding risk to the cap itself. They also do far more visual work in photos than most tiny cap details.
If you're coordinating the full look, matching finishes and colors pays off. Metallic vinyl on the cap looks more intentional when it echoes the braid, trim, or charm tone elsewhere.
Decoration Zones and the Rules That Govern Each One
| Zone | What You Can Change | What Gets Flagged | Smart Move |
|---|---|---|---|
| Cap top | Flat design, lightweight surface decoration | Height, overhang, loose items, blocked tassel | Use vinyl, paper, sealed glitter sheet, or thin fabric |
| Cap underside | Usually little to nothing unless school says otherwise | Hidden messages that break conduct rules | Leave it alone unless your school clearly permits it |
| Gown | Almost nothing | Glue, paint, pins, iron-ons, stains | Steam it, lint-roll it, return it clean |
| Tassel | Placement only, per ceremony rules | Swapping color, blocking movement, extra attachments | Keep it standard and test the swing |
| Stole and cords | Selection and coordination | Improvised pinning, uneven drape, clashing finishes | Match cap accents to accessories, not the other way around |
One smart prep step is reviewing a full regalia overview before you shop or decorate. This guide to graduation cap and gown basics helps clarify what belongs where so you don't try to make the cap do every job.
Your cap should carry one message. Your stole and cords should carry identity and achievement. Split the work and the whole look gets better.
Materials and Adhesives That Actually Hold
The right material wins approval before the design even starts. The wrong one turns into a mess on your gown, your hair, the seat, and the floor by the stage stairs.
Start by ranking materials on three things: weight, approval risk, and cleanup. Not “how cute it looked online.” That's how people end up super-gluing plastic flowers to a cap that gets rejected anyway.
The Materials I'd Use First
Cardstock letters are the workhorse. They're flat, light, easy to trim, and readable from a distance if you choose enough contrast.
Washi tape is useful for borders, clean line work, and quick fixes. It won't save a bad design, but it can make a simple design look finished.
Sealed glitter paper works better than loose glitter every time. You get the shine without covering your gown and your neighbor's sleeve in fallout.
Foam stickers and layered die-cuts can work, but they push your height profile up fast. If your school is strict, they're where trouble starts.
The Adhesives I Trust and the Ones I Don't
Hot glue holds hard, but it's aggressive. Good for topper construction off the gown. Bad anywhere near rental fabric.
Double-sided fabric tape is cleaner and more forgiving. It's a strong choice when you need removable placement or you're mounting a topper carefully.
Tacky Glue works on porous craft materials. It's slower, which is annoying if you're impatient, but useful when you need placement time.
Pins belong only in places where they won't touch or damage the gown. If you're using them under the cap structure for a hidden stabilization trick, fine. If you're pinning things through visible fabric, stop.
Materials and Adhesives Ranked for Cap Decoration
| Material or Adhesive | Hold Strength | Approval Risk | Removal From Gown |
|---|---|---|---|
| Cardstock letters | Moderate | Low | Clean if kept off gown |
| Washi tape | Light to moderate | Low | Clean |
| Sealed glitter sheet | Moderate | Low to moderate | Clean if edges are sealed |
| Foam stickers | Moderate | Moderate | Usually clean, but adds height |
| Lightweight fabric | Moderate | Moderate | Can transfer if badly glued |
| Faux flowers | Variable | High | Risky if petals or stems snag |
| Hot glue | Strong | Moderate to high | Bad on rental fabric |
| Double-sided fabric tape | Moderate | Low | Best removable option |
| Tacky Glue | Moderate | Moderate | Fine on cap materials, not gown fabric |
| Super glue | Strong but brittle | High | Terrible. Stains and cracks |
| Spray adhesive | Broad but messy | High | Overspray gets everywhere |
Glitter Is the Shortcut That Usually Backfires
Loose glitter is one of the fastest ways to get flagged. Schools commonly restrict anything that can detach, obstruct, or create cleanup and safety issues. Chaminade explicitly bans balloons, electronic lights, and décor that dangles or blocks views, while FIU warns against wiring, batteries, and altered cap structure. The operational takeaway is clear. Build for zero snag points, zero overhang, and full tassel compatibility (commencement attire restrictions on lights, dangling décor, and altered caps).
If you love sparkle, use glitter cardstock, laminated glitter print, or sealed glitter vinyl. Same vibe. Much lower risk.
The Gown Problem People Ignore
A lot of cap-and-gown decorations fail because the cap sheds onto the gown. That's why I'm blunt about iron-ons. They belong on approved fabric projects, not on borrowed regalia unless your school and garment allow it. If you're learning the mechanics anyway for personal apparel, this guide on how to apply iron on decals is useful. Just keep that process away from rental commencement wear unless you own the garment and know the fabric can handle it.
Five Cap Design Styles Worth Your Time
Not every grad needs a six-hour custom build. Most don't. The sweet spot is a design that reads clearly, stays flat, and doesn't eat your entire week.
Here's how I rank the most common styles, from smartest to riskiest.
The Styles That Make Sense
Single-word vinyl decals are efficient. One bold word or short phrase, strong contrast, clean border, done. They photograph well and rarely create structural problems.
Washi tape borders are even simpler. They won't carry the whole design by themselves, but they can frame a center phrase or date without adding bulk.
Photo collage tops can work if you edit ruthlessly. Too many tiny images turn into visual mush from the audience.
Floral and ribbon wraps look good in close-ups but get risky once petals, loops, or layered edges start rising off the surface.
Full paint jobs with 3D elements are high effort and high failure. Unless your school clearly allows raised attachments, skip that tier.
Cap Design Styles Compared by Cost, Time, Risk, and Visibility
| Design Style | Total Cost | Build Time | Approval Risk | Visibility from Row 3 |
|---|---|---|---|---|
| Single-word vinyl decal | Under $10 | About 30 minutes | Low | High |
| Washi tape border with short phrase | Under $10 | About 30 minutes to 1 hour | Low | Moderate |
| Photo collage top | Around $10 to $25 | About 1 to 3 hours | Moderate | Low to moderate |
| Floral and ribbon wrap | Around $15 to $40+ | About 2 to 4 hours | Moderate to high | High |
| Full paint build with 3D elements | Around $20 to $40+ | About 6+ hours | High | Variable |
My Ranking, No Sugarcoating
-
Single-word vinyl decal
Best for most grads. Clean, fast, readable. -
Washi tape border plus short phrase
Great if you've got no time and decent taste. -
Photo collage top
Sentimental, but only if you keep image count low and contrast high. -
Floral and ribbon wrap
Fine for staged photos. Much worse for approval risk. -
Full paint with 3D attachments
Only worth it if policy is permissive and you've built things before.
If your ceremony is formal, your cap should read like a sign, not a centerpiece.
The best design is a bold phrase, one accent color, and one finish. Then let the rest of the story show through your regalia layers. If you want idea starters that stay closer to realistic ceremony wear than social-media fantasy builds, look through these graduation cap decoration ideas.
Your Week-Before Decoration Timeline
The grads who panic the least don't work harder. They work earlier. Cap and gown decorations fall apart when everything gets shoved into one late-night craft session.
Break the work into three blocks and keep each block focused.
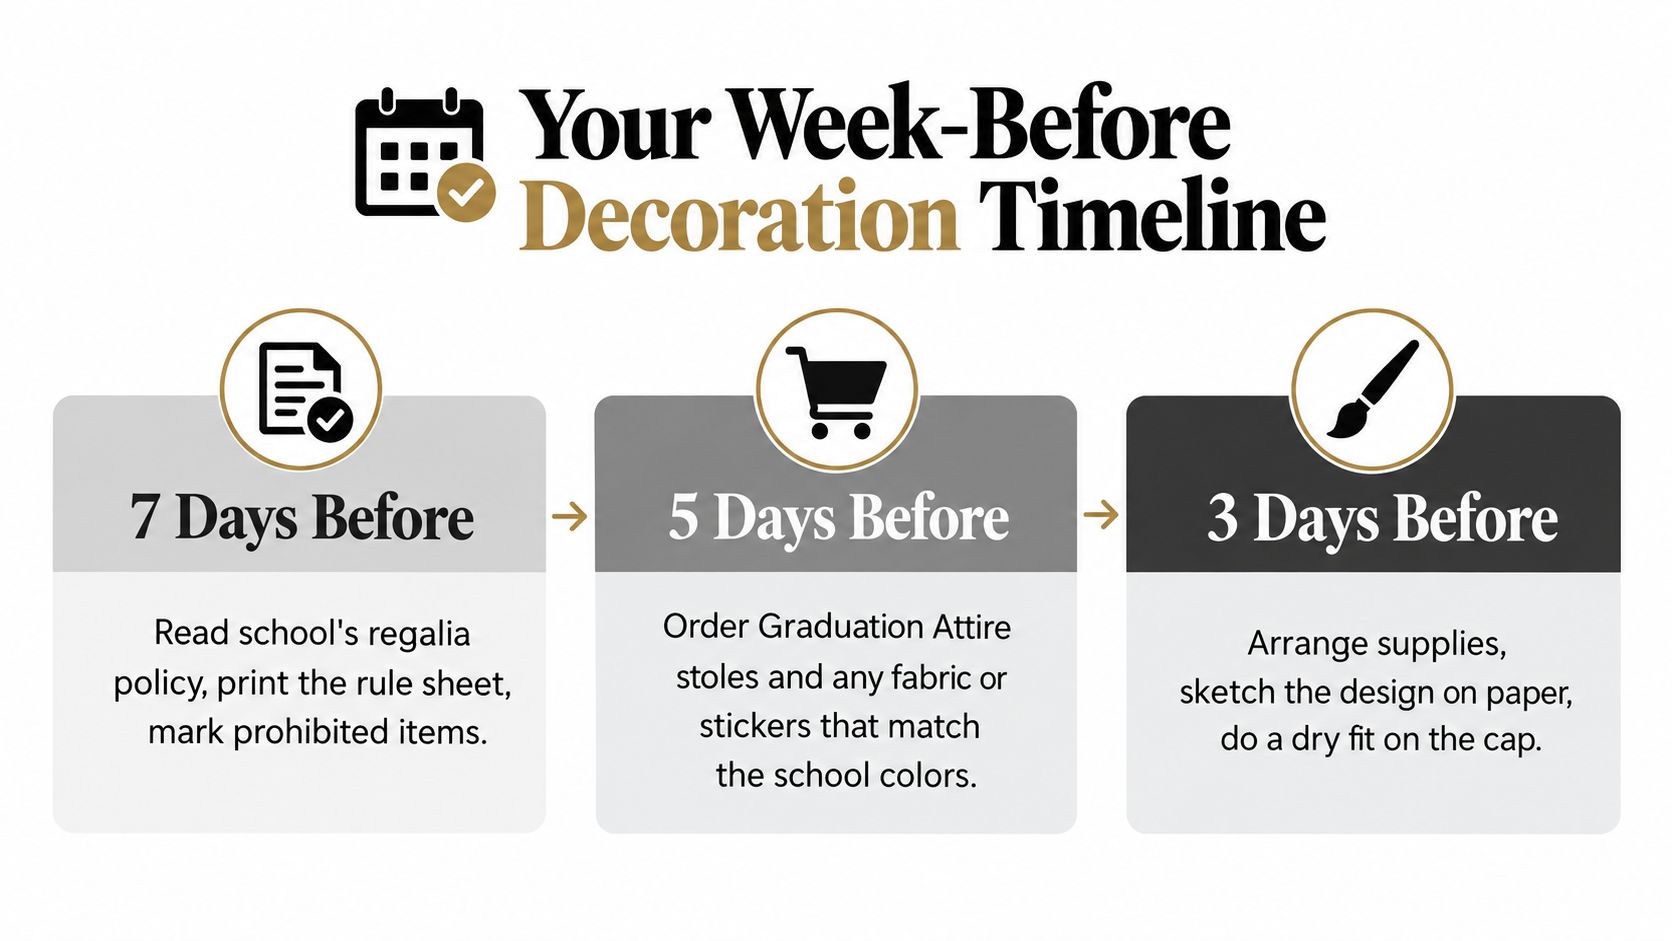
One Week Before
Read the regalia policy carefully. Print it or save a screenshot so you can refer back to exact wording.
Order anything that affects the final look, including stoles, cords, date charms, vinyl, backing paper, and adhesive. Then do a dry fit with the cap and gown together. Not separately. Together.
The biggest mistake at this stage is buying supplies before reading the rules. The second biggest is assuming your cap design won't visually clash with your stole or cords.
The Day Before
This is assembly prep, not experimentation. Cut lettering. Seal edges. Pre-arrange the layout. If you're painting, finish the painting early enough that nothing is tacky by evening.
Any raised pieces you insist on using should be test-mounted now, not discovered in the parking lot tomorrow. If a flower head, bow loop, or layered cutout is going to lift, fail, or block the tassel, you want that bad news today.
The Morning Of
Keep the morning mechanical. Attach the final design. Check tassel placement. Pack the cap flat. Leave with time to spare.
Use a transport plan that protects the top surface. Flat between cardboard works. Loose in a car trunk does not.
The Three Failure Points That Sink Caps
- Last-minute paint: Wet or tacky surfaces pick up lint, fingerprints, and wrinkles.
- Skipped dry fit: A cap that looked balanced alone may look chaotic once the stole and cords go on.
- Bad transport: Pressure bends raised edges, loosens adhesive, and crushes anything delicate.
A Short Ceremony-Eve Checklist
- Policy saved: Keep the written rule page handy.
- Supplies packed: Tape, spare letters, scissors, lint roller, and wipes.
- Cap tested: Shake it lightly. Nothing should shift.
- Outfit staged: Gown, cap, stole, tassel, cords, shoes, and safety pins in one place.
That timeline isn't glamorous. It works.
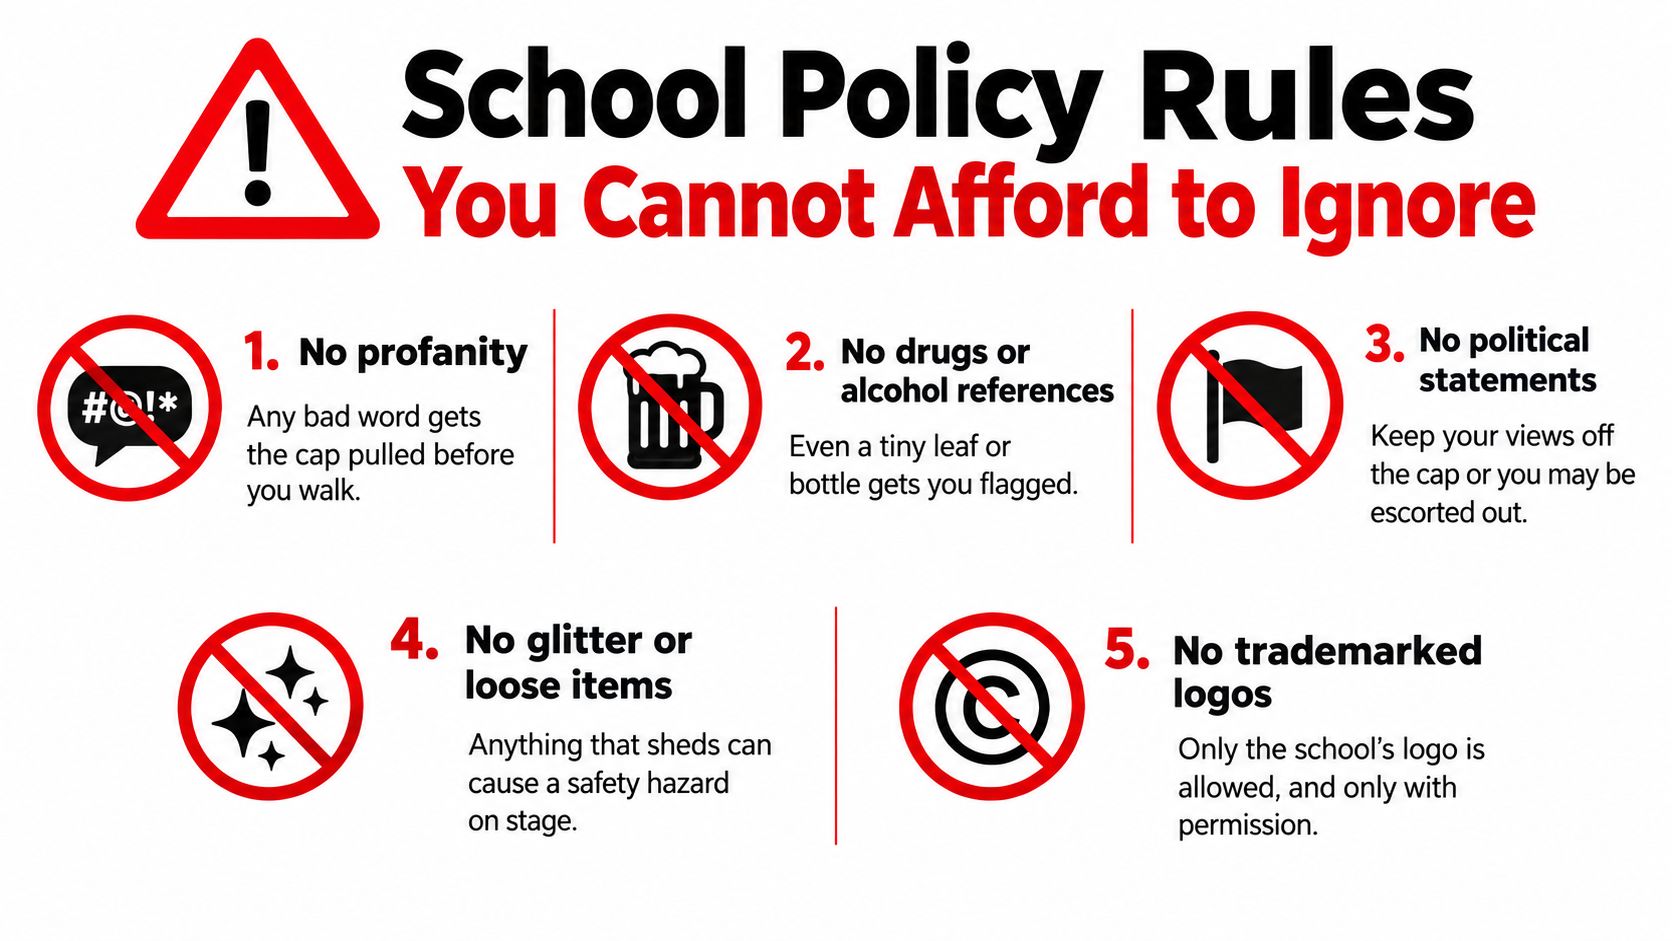
School Policy Rules You Cannot Afford to Ignore
A lot of graduates think policy is negotiable if the design is meaningful enough. It isn't. Committees don't evaluate effort. They evaluate compliance.
The broad rule set across schools is more consistent than people think. Neutral institutional guidance commonly says only the flat top may be decorated, decorations must stay flat, and nothing may hang off the cap, light up, make noise, or block anyone's view. That's why the smartest cap and gown decorations start with the common baseline, then adjust for school-specific exceptions instead of gambling on what social media showed at another campus (plain-English overview of mortarboard decoration dos and don'ts).
The Hard-No Rules
Some rules are instant rejection territory. Follow them exactly.
- Profanity or offensive imagery: Staff don't debate intent at the door.
- Drugs or alcohol references: Even “joke” references can get flagged.
- Lights, wires, batteries, or noisy items: These create distraction and safety problems.
- Loose or dangling parts: If it swings, drops, or catches, expect trouble.
The Rules That Vary But Still Matter
Height limits vary. Some schools quantify them. Others just reserve the right to reject anything that stands out too much. One school bans decorations taller than one inch, another bans lighted or noisy items, and another prohibits three-dimensional objects entirely while allowing only flat, school-appropriate decorations that don't move or make noise (examples of specific mortarboard decoration parameters).
Visibility is another rule you shouldn't test. Some institutions explicitly say decorations must not interfere with tassel movement or the view of students behind you (cap decoration guidance on tassel movement and sightlines).
Hard No Versus Dean's Discretion
Hard-no rules are clean. Break them and the cap gets pulled.
Soft rules are murkier. That's where “school-appropriate,” “tasteful,” or “not distracting” appears. Staff can enforce those unevenly, which is exactly why borderline designs are a bad bet.
Borderline only feels safe until the person at the door is having a strict day.
Get Approval in Writing
If your design sits in a gray area, email the registrar, commencement office, or student affairs office before you build it. Keep the message short. Attach a sketch or mockup. Ask whether the design is acceptable under the regalia policy and save the reply.
That same discipline helps with the rest of your graduation setup too. If you're labeling party bottles for photos or tables and want those details to look polished, this guide on sizing graduation party bottle labels is practical for the celebration side, where the rules are a lot less strict.
And before ceremony day, confirm the tassel protocol so you don't decorate around the wrong assumption. This quick explainer on which side the graduation tassel goes on is worth checking before final assembly.
Final Walkthrough, Ceremony Day, and Your Backup Plan
Ceremony day is not the day to be creative. It's inspection day. Your job is to show up with a cap that's clean, secure, legible, and boring to the people doing the door check.
Start with a fast physical review. Look at every edge. Tug lightly on every attached piece. Lift the tassel and make sure it swings freely. If anything catches, lifts, or flakes, fix it or strip it.
Your Ten-Minute Final Check
Run through this in order:
-
Check the top surface
Press down corners, borders, and letter edges. Flat means flat. -
Test the tassel
It should move without dragging across gems, flowers, or lettering. -
Inspect the gown
Steam wrinkles out carefully. Don't soak polyester. Don't leave water marks. -
Stage accessories
Stole straight. Cords even. Date charm secure. Nothing twisted. -
Pack the cap properly
Sandwich it between flat pieces of cardboard for the ride.
The Correct Order When You Dress
Get the gown on first. Then add stole and cords so you can center them calmly instead of fighting them over your head.
Put the cap on last. Check that the tassel is on the correct side before the ceremony begins, then move it only when your school directs it during the conferral moment. If you need a small charm or commemorative accent, secure it where it won't compete with the cap or interfere with movement.
If Your Cap Gets Flagged at the Door
This happens more than people admit. Don't argue first. Ask what specific element violates policy.
If the problem is removable, remove it immediately. That's why simple topper builds and limited attachments are so useful. If the whole cap is the issue and you have a plain backup, swap it and keep moving.
If staff reject it despite prior written approval, show the email calmly. Don't wave your phone in someone's face. Pull it up, state that you confirmed the design in advance, and ask for clarification.
If a Decoration Falls Off Mid-Processional
Ignore anything minor until you're out of the aisle. The worst move is stopping to fix a loose letter in traffic.
If something major peels back and risks falling onto the floor, remove that piece completely the moment you're off to the side. Better a simpler cap than a trail of debris leading to the stage.
A small emergency kit helps:
- Double-sided tape: Fastest clean repair
- Wipes: For residue or transfer
- Mini scissors: Trim lifting ribbon or backing
- Safety pins: For regalia emergencies, not visible cap fixes
- Lint roller: Essential if you used any fuzzy or shedding material nearby
If the Gown Gets Marked Right Before Photos
First question: stain or wrinkle?
If it's a wrinkle, steam lightly and let it hang. If it's lint or dust, lint-roll it. If it's residue from adhesive or glitter, dab, don't smear. Water makes some messes spread.
If the mark won't come out quickly and the gown is rented, find event staff and ask whether a replacement gown is available. Don't keep scrubbing a rental robe with random products from someone's purse.
When You Can't Decorate the Cap at All
Some schools discourage decorating outright. Others allow so little that it's not worth the risk. Fine. You still have options.
A meaningful stole, honor cords, and a year charm add identity without modifying the cap. They also show up better in photos than many tiny cap details. In the tools-and-shopping phase, one practical option is using Graduation Attire for regalia pieces like stoles, cords, tassels, and charms when you need the rest of the look to carry the story instead of the mortarboard.
If you need an accommodation tied to culture, faith, disability, or recognition, ask early and ask in writing. Keep the request specific. Say what item you want to wear, why it matters, and whether it alters standard regalia or layers over it.
The safest graduation cap is the one that makes staff shrug and your family smile.
Put differently, your cap doesn't need to impress the internet. It needs to survive the doorway, the walk, the photos, and the handoff to the next part of your life.
If you need the rest of your look to do more of the work, Graduation Attire carries the regalia pieces that matter here, including caps, gowns, tassels, cords, stoles, charms, and other graduation accessories. Build a cap that stays approved, then use the rest of your setup to add color, identity, and meaning without gambling on a door check.